Switching sections and transferring target rates via ASD
Tested on-board integrated display/controllers*
* - Only on-board integrated display/controllers are listed for which we were able to determine that the serial interface was functional. Results may differ with different software versions.
** - "GPS Control" must be activated on the on-board integrated display/controller
You can use the ASD protocol to transfer target rates to a prescription map or to switch sections. The degree to which you can use these functions will depend on the on-board integrated display/controller.
In order to be able to perform transfers using the ASD protocol, you will need to activate the "ASD-Protocol" license.
Procedure
To configure the serial interface in order to switch sections using your on-board integrated display/controller:
- þ
- You have activated the "SECTION-Control" parameter in the "General" menu of the TRACK-Leader application.
- þ
- You have checked whether you need to activate the ASD protocol on the on-board integrated display/controller. If yes, you have activated the protocol.
- ⇨
- A new implement profile appears on the screen.
- 6.
- Configure the parameters as shown in the following steps.
- 7.
- "Operating Mode" - "Section switching"
- 8.
- "Protocol" - "ASD"
- 9.
- "Implement type" - Select the implement with which you are working.
- 10.
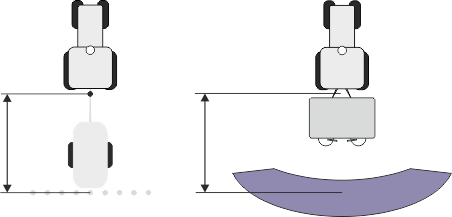
- "Tractor<-->Working point" - Here, enter the distance between the suspension point of the tractor and the working point.

- 11.
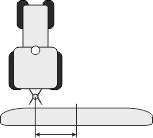
- "Offset L/R" - This parameter is used to set the geometry of asymmetrical implements. Here, input the distance by which the middle of the working width should be shifted. For a shift to the right, enter a positive value, and for a shift to the left, enter a negative value.

- 12.
- "Working Width" - The working width set in the on-board integrated display/controller.
- 13.
- "No. of sections" - The number of sections set in the on-board integrated display/controller.
Further steps
You have set up the serial interface. You must now configure the applications of the terminal.
In the TRACK-Leader application:
- 1.
- Activate the "SECTION-Control" parameter under "Settings / General".
- 2.
- Configure the section switching in "Settings/ SECTION-Control".
- 3.
- Load a prescription map.
You can load the prescription map in two ways:
- ▪
- As a shp file, in the TRACK-Leader application.
- ▪
- As part of a ISO-XML task, if you are using the ISOBUS-TC application and a FMIS.
For more information, please refer to the TRACK-Leader and ISOBUS-TC operating instructions.


 - Switch on the terminal.
 - Open the list of implement profiles.
 - Add a new implement profile.
 - The width of the individual sections set in the on-board integrated display/controller.
 - Back.
 - Activate the implement profile.